Primal Optimization Group

We are a high-end raiding community with a focus on hardcore progression, speeds, and parse.


POG strats

Intended for an optimized setting

Have a suggestion or feedback for our strats? Let us know in our Discord.Curious about a design choice? Read more info on POG StratsClick here for Abyssos strats


Abyssos strats


P12S: Pallas Athena

PF Description Copy/Paste
Barse | POG Strat | https://primaloptigroup.carrd.co/#p12s2
Barse | POG Strat | no invuln Palladian 2 | https://primaloptigroup.carrd.co/#p12s2

Palladian Grasp 1

Gaiaochos

The Classical Concepts: BPOG

Palladian Ray

Crush Helm

H1 → MT | H2 → OT

Caloric Theory: Papan

https://ff14.toolboxgaming.space/?id=286982839316861&preview=1#1

Ekpyrosis

Pangenesis: 2+0

No stack + short debuff in first towers

First towers players in northmost towers

Palladian Grasp 2: default

Change invulning tank as necessary

Palladian Grasp 2: no invuln

If MT is left 0: Rescue after first TB hit

The Classical Concepts 2

Optional: move directly to final shapes for casters

Palladian Ray

Caloric Theory 2

R1 flex. Always clockwise. No mid pass
Return to original spot after passing

7th player go out in any direction & return

Gaiaochos 2

T/H north, DPS south

Summon Darkness

Non-tethered players block beam at these spots
Tethered players do not move after first set


Tank Mitigation: No invuln Palladian 2

MechMTDamageOTDamage
Palladian Grasp 1Everything/ Holmgang<56kEverything<56k
Crush Helm 1Everything<71k totalInvuln0
Palladian Grasp 2Everything + Buddy on OT<78kRampart + Short CD<74k
Crush Helm 2Invuln + Buddy
or Cover on OT
0Everything
(- Rampart)
<78k total

Appendix

Toolboxes/Raidplans

No invuln Palladian Grasp 2:
https://raidplan.io/plan/S4UOZfV0X7fCfeFd

Always CW + return to original spot Caloric 2:
https://raidplan.io/plan/jQh8v1JgYxe7E0un

Gaiaochos 2 :
https://ff14.toolboxgaming.space/?id=415090574696861&preview=1


P12S: Athena

PF Description Copy/Paste
Barse | POG Strats | https://primaloptigroup.carrd.co/#p12s1
Barse | POG Strats | Uptime SC2A | https://primaloptigroup.carrd.co/#p12s1

Basic Setup

Paradeigma 1

Mech relative. SAM/R1 baits beam mid

MT invulns second beams + auto

Paradeigma 2

Resolve based on players

Superchain Theory I

Paradeigma 3

Tanks adjust for the healer on their side

Tanks drop Souls between GCDs

If beam DPS are on aoe covered platform

South tank take a step back for beam

If tower DPS are on aoe covered platform

North tank take a step back for beam

Straight (non-diagonal) tether DPS take mid tower

Superchain Theory 2A: default

Superchain Theory 2A: Uptime

Outer edge of Waymarks

See section for waymark coordinates

Dialogos 2

If PLD/GNB: cannot be done. Must do 6/2 or 7/1

Invuln Dialogos stack
Non-invuln tank take Apo/Peridialogos alone

Superchain Theory 2B: boss relative


Appendix

Waymark Coordinates

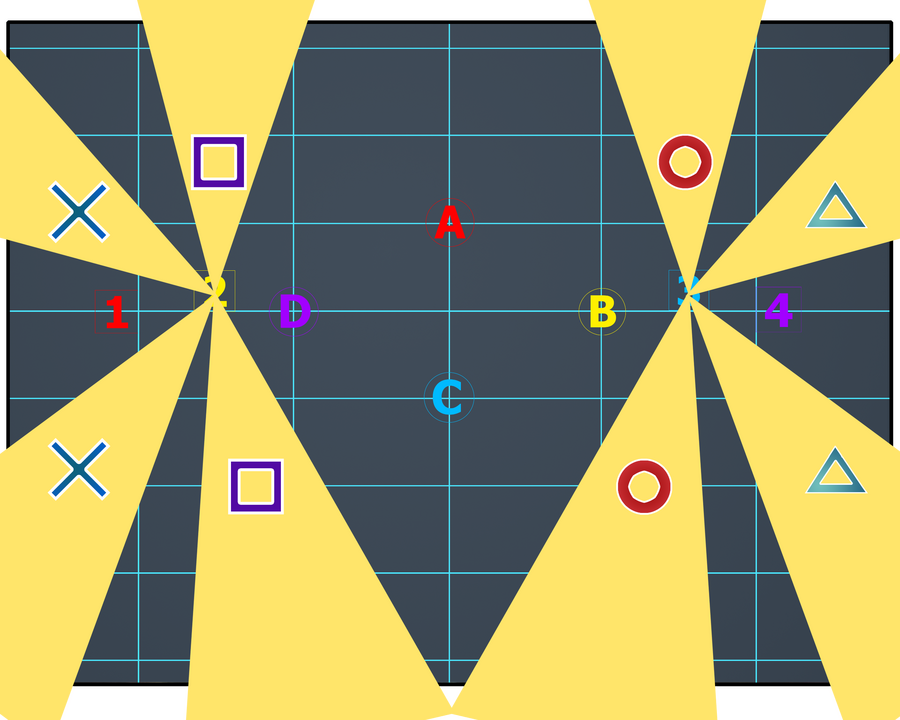
{"Name":"POG SC2A uptime","MapID":943,"A":{"X":100.0,"Y":0.0,"Z":85.0,"ID":0,"Active":true},"B":{"X":111.85,"Y":0.0,"Z":100.0,"ID":1,"Active":true},"C":{"X":100.0,"Y":0.0,"Z":116.6,"ID":2,"Active":true},"D":{"X":88.15,"Y":0.0,"Z":100.0,"ID":3,"Active":true},"Four":{"X":93.7,"Y":0.0,"Z":84.85,"ID":4,"Active":true},"One":{"X":106.3,"Y":0.0,"Z":84.85,"ID":6,"Active":true},"Two":{"X":106.1,"Y":0.0,"Z":100.0,"ID":5,"Active":true},"Three":{"X":93.9,"Y":0.0,"Z":100.0,"ID":7,"Active":true}}

Uptime SC2A: note on precision

Uptime SC2A is incredibly tight to a point that it is recommended to use Pixel Perfect. There is a 0.65 yalms leeway shared between both cleaves, which would be about 0.5 yalms considering the half-room offset. Splitting this into two, it is about one tenth of a marker's diameter worth of leeway for reference. You may amend the following to have more consistency with the strat.

Half-room cleaving first orb

Inner pairs offset away from half-room

Half-room not cleaving first orb

Outer pairs offset away from half-room

Dialogos: 7/1 variation

OT takes Apo/Peridialogos alone
Discuss between tanks as this is a tank mech

MechMTDamageOTDamage
Para 1InvulnN/AInvulnN/A
Glaukopis 1Everything + Buddy on OT<76kRampart + Short CD<63k
Dialogos 1Buddy on OTN/AEverything (no Rampart)<88k
Glaukopis 2Everything + Buddy on OT<76kRampart + Short CD<63k
Dialogos 2 GNB/PLDBuddy on OT (if 7/1)N/AEverything (no Rampart)<88k
Dialogos 2 Other compInvuln + Buddy on OTN/AEverything (no Rampart)<88k

Superchain Theory I: BLM Rel. variation
(Minimum Fun version)

H1 & R1 can take Superchain Emission closer to second orb
This formation can also be used during Superchain 2A for RDM melee


P9S: Kokytos

PF Description Copy/Paste
Barse | POG Strats | https://primaloptigroup.carrd.co/#p9s
Barse | POG Strats | SAM Rel. Succession | https://primaloptigroup.carrd.co/#p9s

Basic Setup

Archaic Rockbreaker

DPS CCW for Archaic Rockbreaker & Thunderbolt. Use coloured waymarks
Optional M2/R2 swap to create melee/ranged pairs

Scrambled Succession: JP

https://raidplan.io/plan/FeOtS0Tri0FSalXm

Comet

T/H & R2 bait first Thunderbolt
DPS & OT bait second Thunderbolt

Tanks bait Beastly Bile alone (~63k)
MT N CW | OT NW CCW

Chimeric Succession

Ranged & Healers bait
1 NW | Party S


Appendix

Note: DPS do not take first Thunderbolts per PF norm because bad patterns can occur for melees & BLM

Scrambled Succession: SAM Rel. Variation

https://raidplan.io/plan/btjR-JQHcewu-KtO
Raidplan to be polished


P11S: Themis

PF Description Copy/Paste
Barse | POG Strats | https://primaloptigroup.carrd.co/#p11s

Basic Setup

TH CCW for pairings & groupings

Arcane Revelation & Shadowed Messengers

G1 west side, G2 east side

Resolve pairs left/right respectively

Lightstream

Directional left/right split
Resolve pairs left/right respectively

Note: all other Overrulings are resolved boss relative

Dark and Light: Improved Uptime Kindred

Starting position. Long tank voke
Everything else is the same as Uptime Kindred

T/H on letters. DPS on numbers
Long tank & DPS N/S

Dark Current

Pre-position: T/H + R2 W, DPS + H2 E
E/W pattern: go to close safe spot

MT point boss N or S for Jury
Resolve Jury boss relative

Example showing how to point boss in N/S pattern

Letter of the Law

Party start SW to nearest safe spot
Tethered tank voke
MT voke when going to tower


Appendix

Improved Kindred D&L Raidplan

https://raidplan.io/plan/PbnSYbcju77rb_4E

Dark and Light: POG D&L

https://raidplan.io/plan/Y0VNkGdFFAtmgLtR
Better than Kindred Uptime by granting more positional access. However may take a bit to learn. More recommended for statics.


P10S: Pandæmonium

PF Description Copy/Paste
Barse | POG Strats | https://primaloptigroup.carrd.co/#p10s
Barse | POG Strats | 2211 turrets | https://primaloptigroup.carrd.co/#p10s

Dæmoniac Bonds Spreads

Bonds 1:
"Line" spread

Bonds 3:
"Box" spread

Pandæmonium Pillars

Dividing Wings 1

T/H tether break DPS (close) webs
DPS tether break T/H (far) webs
Optional: mobile players should break far webs when freed (with Sprint)

Silkspit

Silkspit 1

Silkspit 2

Pandæmonium Meltdown 1

Dæmoniac Bonds 1

"Line" spread

Roles stack

Pairs

Pandæmoniac Turrets: 2221 MHRT

Diagonal 3rd Turrets

Tanks last. Do not bait tank laser

Lineup is shifted horizontally

Dæmoniac Bonds 3

Spread first: "Box". R2 mid

Precise positions

Stack first: on markers

Stack second: use markers

Spread second: R1 far, tanks on markers

Dividing Wings 2 & Entangling Web

T/H left, DPS right

Dæmoniac Bonds (post Harrowing Hell)

Pairs: "Pillars" spread

Roles: "Box" spread


Appendix

{"Name":"POG P10S","MapID":938,"A":{"X":100.0,"Y":0.0,"Z":85.0,"ID":0,"Active":true},"B":{"X":104.0,"Y":0.0,"Z":101.85,"ID":1,"Active":true},"C":{"X":100.0,"Y":0.0,"Z":111.2,"ID":2,"Active":true},"D":{"X":96.0,"Y":0.0,"Z":101.85,"ID":3,"Active":true},"Four":{"X":96.0,"Y":0.0,"Z":93.0,"ID":4,"Active":true},"One":{"X":104.0,"Y":0.0,"Z":93.0,"ID":5,"Active":true},"Two":{"X":108.0,"Y":0.0,"Z":111.2,"ID":6,"Active":true},"Three":{"X":92.0,"Y":0.0,"Z":111.2,"ID":7,"Active":true}}

Pandæmoniac Turrets: 2211 MHTR variation

Ranged last. Requires tank personal mit + 3x10%

Dæmoniac Bonds 3: Line variation

Dæmoniac Bonds 3 - Role Stack

Formation is shifted horizontally
H2 can slidecast from the red dot

POG Strats: Explained


Overview

The primary target audience of POG Strats are optimization parties in a pickup group fashion. As such, POG strats are designed to be consistent with PF norms in mind when possible. Default POG strats have a limit on the amount of specific cooperation required between players, as well as strats that require a degree of learning (even if it may seem very simple to learn). Changes from common PF strats are examined on a case-by-case basis and any deviation from PF methods should yield a sufficient gain. Strats different from PF norms also have a timeframe consideration: players are more likely to adopt new strats after some time has passed compared to earlier in the tier.In addition to the default strats, variations of strats are provided to accommodate varying use cases and players are greatly encouraged to include variations in their PF as they see fit.The secondary target audience of POG strats are semi regular optimization statics and regular optimization statics. While some specific alterations to fit player needs and comfort are expected within the individual statics, we think POG Strats can satisfy the vast majority of demand in static optimization.


P9S

Archaic Rockbreaker
H1 is expected to move up with the melee. Swift (potentially) and/or a dot refresh can be used here. Healers that need to stay at the wall are expected to pick the H2 position. Creating melee/ranged pairs can be done on a individual PF basis.
Scrambled Succession
JP strat is used as default as that is the common NA PF strat and provides a decent degree of SAM utility. SAM relative is not too difficult but still requires some deviation from players.
Comet
Tanks taking Bile alone is a very slight gain for BLM and comfort for healers. While the benefit is small, it's easy enough to execute as the default strat. T/H take first lightning because the second Bile and exploding meteor create two unsafe (inter)cardinal zones. This could mean extra travel distance for BLM or lost positional access for melees if the unsafe zones are next to them.


P10S

Dividing Wings 1
East/west Wings (with healer breaking south stack) is chosen as it creates easier less distance traveled for casters and healers. The exception here is if casters have a tether, in which case an arrangement with freed DPS breaking the T/H webs can be made.
Silkspit
H2's Silkspit 2 spot is chosen to retain similarity with its spot in Silkspit 1. While it might be a bit strange to have H2 left of H1, the value in consistency should be slightly more valuable. OT could stay on the right platform in Silkspit 1 as Silkspit 2 but needs to ensure catching buffs, which is why it is on the main platform in this spread configuration.
Dæmoniac Bonds
The common "Line" spread has some tightness in execution and can be unfriendly to H2 in Bonds 3. "Box" spread solves some of these issues but introduces variations (as well as deviating from PF strat in the most common wipe point) as Bonds 1 has two patterns. Ultimate it was decided that "Line" is used for Bonds 1 and "Box" is used for Bonds 3.
Pandæmoniac Turrets
2211 is superior over 2221 but requires extra coordination as well as being a new strat. Diagonal 2221 with healers being second is chosen as a compromise as it solves some unfriendliness to healers but remains unideal for casters and tanks. Players should choose the 2211 variation if they wish for additional optimization beyond Diagonal 2221.


P11S

Dark and Light
In Improved Uptime Kindred, by swapping healers and their tethered DPS, movement required for healers is greatly reduced. Short tank and short DPS are swapped for easier positioning mnemonic. POG D&L is a better D&L strat and provides more positional access. However, upon testing, the effort required for PF to learn the strat does not seem to be worth the investment even though it's not very complicated.
Dark Current
Pointing the boss north or south for Jury gives healers and casters a better idea of their destination and thus allows more efficient movement.


P12S Door

Paradeigma 1
Allows MT to invuln the auto and SAM to obtain Third Eye proc. R1 is chosen over melee as the non-SAM baiter for consistency as the self-heal and mit of meleees are negligible here. BLM specific variation of this strat can be done but is slightly tight on positioning.
Dialogos
7/1 can be done for both Dialogos. However this requires slightly more specificity and should be decided on a group basis.
Uptime Superchain Theory 2A
Pairings are done to ensure healers are inner while melees are south relative to boss.


Hall of Fame


Anabaseios Prog Season

PlayerRoleTeamPlacement
Lial VariaSupportDN4th
Surana CrescenceRangedKindred8th
Darth CinnabonSupportKindred8th
John Lennon'MeleeNo Hit9th
Reina LeighRangedNo Hit9th
Yumiya NagatsukiRangedUnreal11th
Sigurd RomantiaCasterUnreal11th
Buns McgruberTankNot the Tethers16th
Mister WonderfulCasterNot the Tethers16th
Blaire ArtemisHealerUnwind20th
Effie HowardHealerUnwind20th
Somebody ElseMeleeUnwind20th
Cillian DrakeRangedUnwind20th
Dran KuoCasterUnwind20th
Amen BreakSupportUnwind20th
Katsu CurryTanksleepocat21st
Jackal Ka'tuiMeleesleepocat21st
Ty CiMeleesleepocat21st
Noya KiRangedsleepocat21st
Eksu PlusionCastersleepocat21st
Acrue CloHealerPerception: Zero22nd
Sylv EonHealerPerception: Zero22nd
Tenyu ChanMeleePerception: Zero22nd
Spira DonoMeleePerception: Zero22nd
Shin HiRangedPerception: Zero22nd
Youmu MyonMeleeSex Gods 300023rd
Miwi CofuRangedSex Gods 300023rd
Pop PoponoriCasterLinearityTop 30

Omega Prog Season

PlayerRoleTeamPlacement
Izumi UiMeleeKindredTop 10
Surana CrescenceRangedKindredTop 10
Reina LeighRangedNo HitTop 15
Youmu MyonMeleeSex Gods 3000Top 25
Miwi CofuCasterSex Gods 3000Top 25
Lial VariaSupportOtter NutsTop 25
Sylv EonHealerPerception: ZeroTop 25
Shin HiHealerPerception: ZeroTop 25
John Lennon'MeleePerception: ZeroTop 25
Yeatle YeatletCaster攻略请用shellingway
一套谢谢喵
Top 25
In ShamblesMeleeblushiesTop 30
Emiri KimuraCasterblushiesTop 30

Abyssos Speeds Season

PlayerRoleTeamPlacement
Izumi UiMeleeKindred6.2 rank 1
Surana CrescenceRangedKindred6.2 rank 1
Katsu CurryTanksleepocat6.2/6.28 rank 2/4
Ty CiMeleesleepocat6.2/6.28 rank 2/4
Jackal Ka'tuiMeleesleepocat6.2/6.28 rank 2/4
Noya KiRangedsleepocat6.2/6.28 rank 2/4
Eksu PlosionCastersleepocat6.2/6.28 rank 2/4
Jacklyn GriffinHealerRNG Factory6.2/6.28 rank 3
Monster WhispererHealerRNG Factory6.28 rank 3
Nitian ErxingMeleeRNG Factory6.2/6.28 rank 3
Yan DaemoniumRangedRNG Factory6.2/6.28 rank 3
Silvi VeeCasterRNG Factory6.2 rank 3

Abyssos Prog Season

PlayerRoleTeamPlacement
Izumi UiMeleeKindred4th
Yumiya NagatsukiRangedUnreal6th
Lial VariaSupportDN7th
Katsu CurryTanksleepocat11th
Apollo Van-waddleburgTanksleepocat11th
Swift SamaHealersleepocat11th
Aria AokiHealersleepocat11th
Ty CiMeleesleepocat11th
Jackal Ka'tuiMeleesleepocat11th
Noya KiRangedsleepocat11th
Eksu PlosionCastersleepocat11th
Vic MinariSupportsleepocat11th
Jack GahardianTankNO. BIG. DEAL.22nd
Buns McgruberTankNot the Tethers24th
Azula AkaganeHealerNot the Tethers24th
Cyrilla PalanRangedNot the Tethers24th
Kali WolfCasterNot the Tethers24th
Andu NguyenCasterMeme Team25th
Celestia KrosisMeleeUlti|Mania29th
Jitter BugMeleeHorny on Main35th
Mango ParfaitCasterHorny on Main35th
Sausage RollTankSex Gods 300036th
Sylv EonHealerSex Gods 300036th
Shin HiCasterSex Gods 300036th

Support means additional members such as 9ths.


DSR Prog Season

Eselia Momo | Vokun Volaan | Season Wind | Scholar Bot
Speedy Chan | Aleph Null | Setoto Monoka | Mad's Hatter


Asphodelos Parse & Speed Season

Cyrilla Palan | Mr Deathclouds | Kaitlyn Kryzjeli | Whyami Small
Katsu Curry | Izumi Ui | Keres Sembren | Silvi Vee

PlayerJobRankMetric
Train CatWAR1aDPS
Sylv EonSCH1rDPS
Gaia NihilMNK1aDPS
Archy AkatsukiNIN3aDPS
Shuki SakuraBLM4rDPS
Pressure CookerSMN5aDPS
Saucy AioliWHM6aDPS
Mal MalGNB7aDPS
Mio Mi'yewBRD7rDPS
Elsen DoDRK8aDPS
Swift CastSCH8aDPS
Sen JouchokanaDRG8rDPS
Silvi VeeBLM8rDPS
Suzuka IchiharaGNB9aDPS
Katsu CurrySAM9rDPS
Swift SamaWHM10rDPS

POG Venue

Exodus Empyreum W6P12
Decorated by Lacey Mistmourn

Community Highlights

POG Venue Opening Ceremony

Asphodelos Group Photo

Guides & Docs

World Prog Logistics by Lial Varia (lial)

Raid Consistency Primer also by Lial Varia

Fundamental Positioning Guidelines by Reina Leigh (reinaleigh)


If you have any questions, feedback, or comments, feel free to contact the authors. You can find us in our Discord.

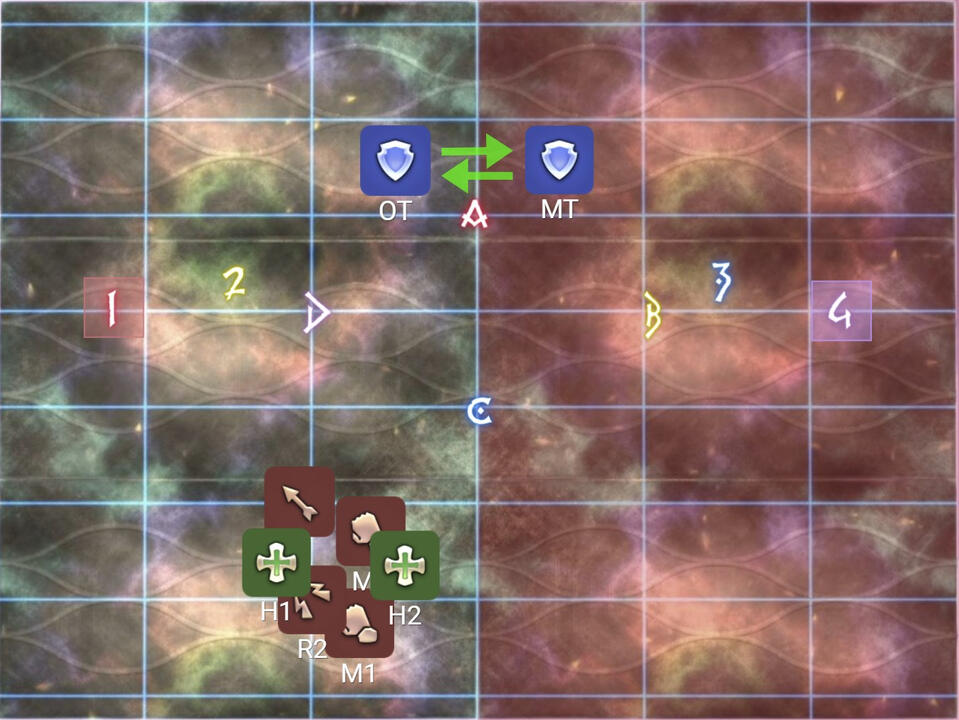
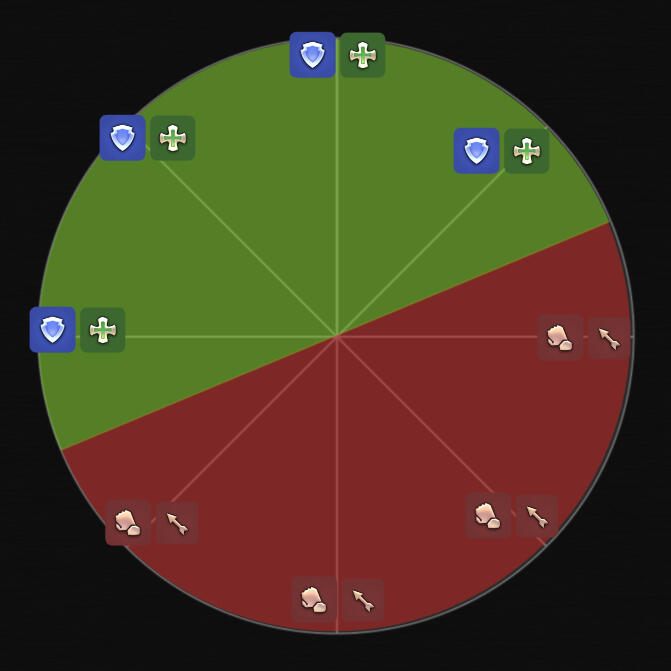
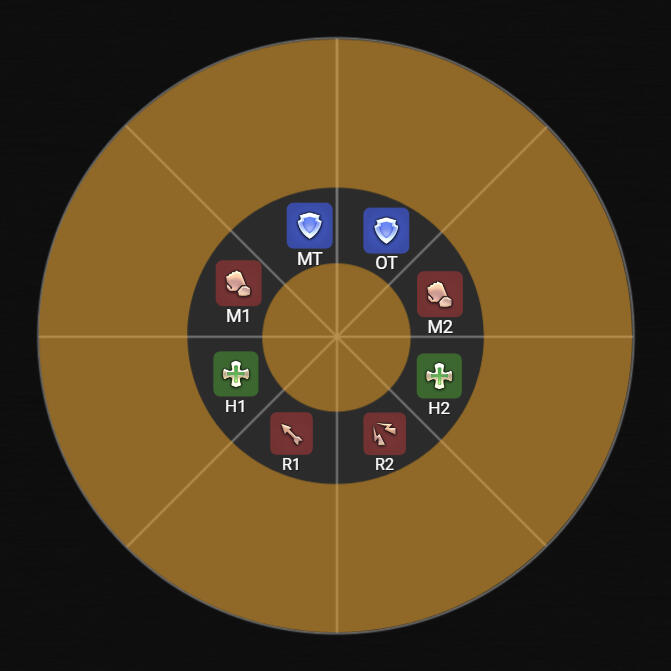
Why is 1 NW and T/H CCW?

It is more common in general PF to have MT in the left group, which means the T/H CCW system should be used to retain consistency in pairings and groupings. Using the T/H CW system creates some issues that are PF specific. Under T/H CCW, in order to have corresponding waymark colours to pairings, the 1 NW marker system is used.For more information, please read the Fundamental Positioning Principles document.

Why is MT group 2?

Under proper positioning principles, after rotating clockwise, MT ends up NE, the right side, which is group 2 (assuming the east group is group 2). However, PF has been conditioned to put MT on the left side as typical reading order is from left to right. To accommodate this norm, in fights where MT does not rotate, we put MT in group 1. In fights where MT does rotate, we put MT in group 2.


P5S: Proto-Carbuncle

Basic Setup

Note: MT is G1 or West group in this fight

Puddles

Squall/Surge

Eruptions can be baited mid

Devour
Boss Relative (Uptime)

TH Relative Left
DPS Relative Right

Ruby 4 Stacks

Ruby 5

H1 + tanks North/West
H2 + melees East/South

Variations

Melee Uptime Surge

Melee Uptime Ruby 4

Credits to Hansoo#0001 and Paukky#0509 for the graphics.


P6S: Hegemone

Basic Setup

Note: MT is in group 1

Unholy Darkness 1

Pathogenic Cells

Aetherial Exchange: Uptime

TH Stack

Precise Positions

DPS Stack

Precise Positions

Transmission

Aetherial Exchange 2

Unholy Darkness 2

East West split

Dark Ashes

Cachexia

THRM static positions

Step in to bait

Correct debuffs anchor

All DPS flex

Dark Sphere Spreads (Optional)

Uptime Variations

Melee Uptime Unholy Darkness 1

Caster Uptime Pathogenic Cells

Uptime Unholy Darkness 2


P7S: Agstidis

Basic Setup

Group 1: MT H1 M1 R1
Group 2: OT H2 M2 R2
DRK should solo tank all Condensed Aero

Inviolate Bonds

Multicast

Knockback + Exaflare: Default

Knockback + Exaflare: JP dodge

Adjust positioning after knockback

Sleepo Purgation

Famine

Healers and Ranged may take any singular tether cleave

Death: Default

Death: Caster Uptime

War


P8S: Hephaistos

Basic Setup

Note: MT is G2 or East group in this fight. Why?

Protean + Light Party Split

Melee + Ranged Partners

Snake 1

Tanks and Melees flex. Group 1 NW CCW, Group 2 N CW

Manifold: Default

Line aoe baits at intercards.

Manifold: Caster Relative

Both tanks invuln

Line AOE baits. Cardinals except N are safe.

Dog 1

Spreads

Jumps

Fourfold

Spreads

Corners. G1 West, G2 East

Return to initial positions for spreads or stacks
Caster adjustments may be applied

Snake 2

Spriggan. Same priority as Snake 1

If going for P8S Final:

Fourfold Spreads

Dog 2

Standardized Mitigation Plan: WIP


P8S: Hephaistos II

Note: MT is Group 1 in this fight

NA1 spread/stack: Default

Clock spreads

Stack

Stack behind

Mirrored on the other side

NA1 Fire/Ice: Improved 1-tile
PLEASE READ THIS PROPERLY & DIGEST THE INFO

Healers and Ranged anchor
TH Pair Priority: OUT | H1>MT>OT>H2 | IN
DPS Pair Priority: IN | R1>M1>M2>R2 | OUT

Tanks or melees flex on each side if they are not the NA role.
FLEXERS DO NOT BAIT ICE.

Precise positioning
NA role does not move

Inner position on the vertical line
Outer position opening of the triangle

Tanks flex + Fire

Tanks flex + Ice

Melees flex + Fire

Melees flex + Ice

Movement is reversed if ice → fire.

High Concept 1

Unused DNA should go back to initial spot and take second Defamation

2-stack rotate CW. Skip unused DNA
3-stack rotate CCW. Skip unused DNA

Stacks/Short Defamation North
Long Defamations South

Limitless Desolation

NA2 Spreads + Stacks

High Concept 2

Towers bait respective
side's tether

DNA & Gamma Combine West
Alpha & Beta Combine East

Dominion

Default group 1 flexes. Default THRM
Converge after spread for buffs

Default spread

Alternative spread

Appendix

NA1: Beetle Variation

More BLM friendly

Spreads first

Stack second

Stack first

Mirrored on the other side

Optional NA1 R1 Adjustment

More detailed Toolbox for High Concepts:
https://ff14.toolboxgaming.space/?id=350473109343661&preview=1

Improved 1-tile Raidplan: https://raidplan.io/plan/NRVPQO3LfTYeDVDd